Es wird der Austausch des Motortreibers Achse 6 bei H600 beschrieben.
|
|
WARNING! Potential personal injury due to untrained operators ⇒ Repairs should only be carried out by individuals with technical and electrical training! |

Required replacement parts:
|
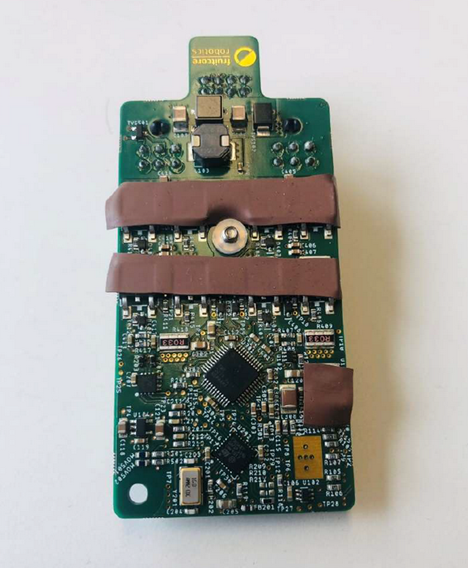
El. VM Motortreiber 2021.05 HORST600 |
PP005331 |
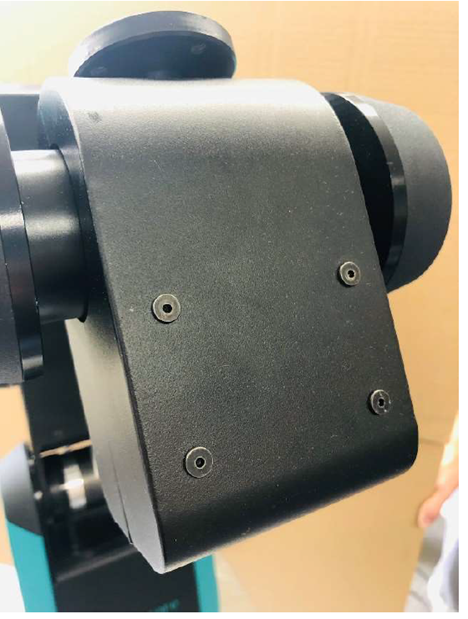
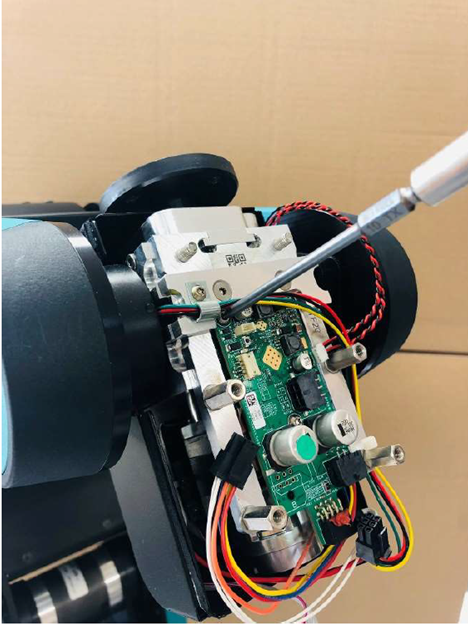
- Move the robot to the position shown in the illustration and ensure the system is powered off.


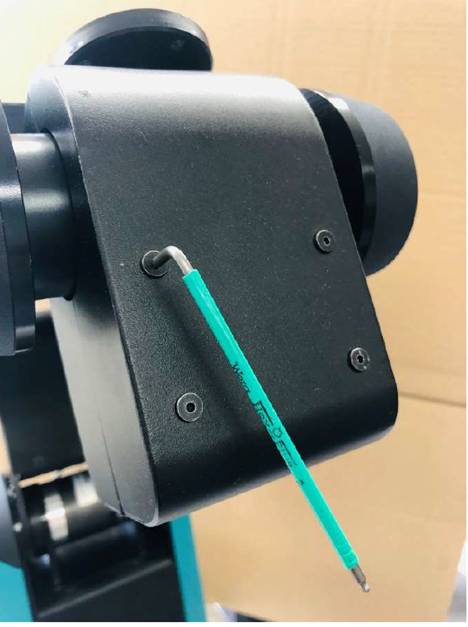
- Loosen the screws of the cover that is protecting the motor driver.

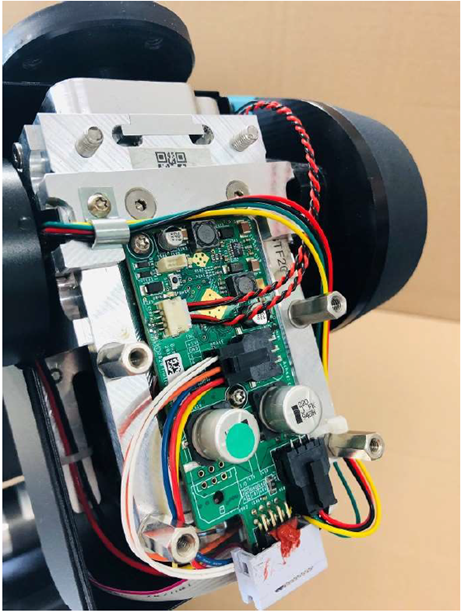
- Disconnect all the connectors of the motor driver. Be sure to carefully remove the connections to avoid any damage.

- Loosen the screws of the motor driver using a TX10 screwdriver. The screws are secured by spacers and cannot be separated from the motor driver.

- When assembling the new motor driver, make sure that the thermal pads are properly in place. Position the new motor driver in the same location as the old one and secure it with the screws.

- After dismantling the motor driver, the robot must be reassembled in reverse order. Begin by placing the new motor driver in the correct position and securing the screws with a TX10 bit. Note that the screws are secured by spacers and cannot be separated from the motor driver.
- Now, connect all the connectors of the new motor driver and reattach the cover..
- Start up the system and check the software status.